The engine is the biggest block on the bike.
The engine of the CBR1000F (SC21) that I am currently restoring is so cool (in my opinion) that it is a shame that it is not visible from the outside, but the inside of the cowl is prone to moisture accumulation. However, the inside of the cowl was in a very disappointing condition with rust, oil, and mysterious dirt.
However, it was highly likely that the engine had hardly been running as indicated by the meter, so after briefly checking the condition of the engine itself, I decided to try to polish it as much as possible as a DIY project.
Diary of [Red_One’s DIY Restoration]
- Checking the condition of the engine <Chapter 1>
- Preparation for engine polishing
-
Engine polishing
- Electric grinder
- Electric Drill
- Checking the condition of the engine <Chapter 2>
-
Engine polishing work summary
- Tools and Equipment Used
- Homemade E0ngine Stand Materials
- Purchased Parts
Checking the condition of the engine <Chapter 1>
First I checked the condition of the engine.
If the pistons were seized or leaking compression, the engine block would need to be disassembled and OH’d.
Fearfully, we removed the head cover and lubricated each part with a bell hammer. Move the crank slowly with a wrench and first check that the pistons and cams are working properly. Then disconnect the plugs and connect the compression gauge. Connect the new battery that we prepared and run the cell motor.
I was a bit nervous because there was poor contact with the key cylinder, but after spraying it with a contact revival spray, the problem disappeared, and despite appearances, I was able to confirm that all four cylinders were producing within the specified compression. At any rate, we are off to a good start.
I was greedy and tried to start the engine by pumping gasoline into the carburetor from the outside to see if it would start, but as expected, it did not. At that time, replacement parts for the carburetor were not yet available, so we decided to precede the polishing process.
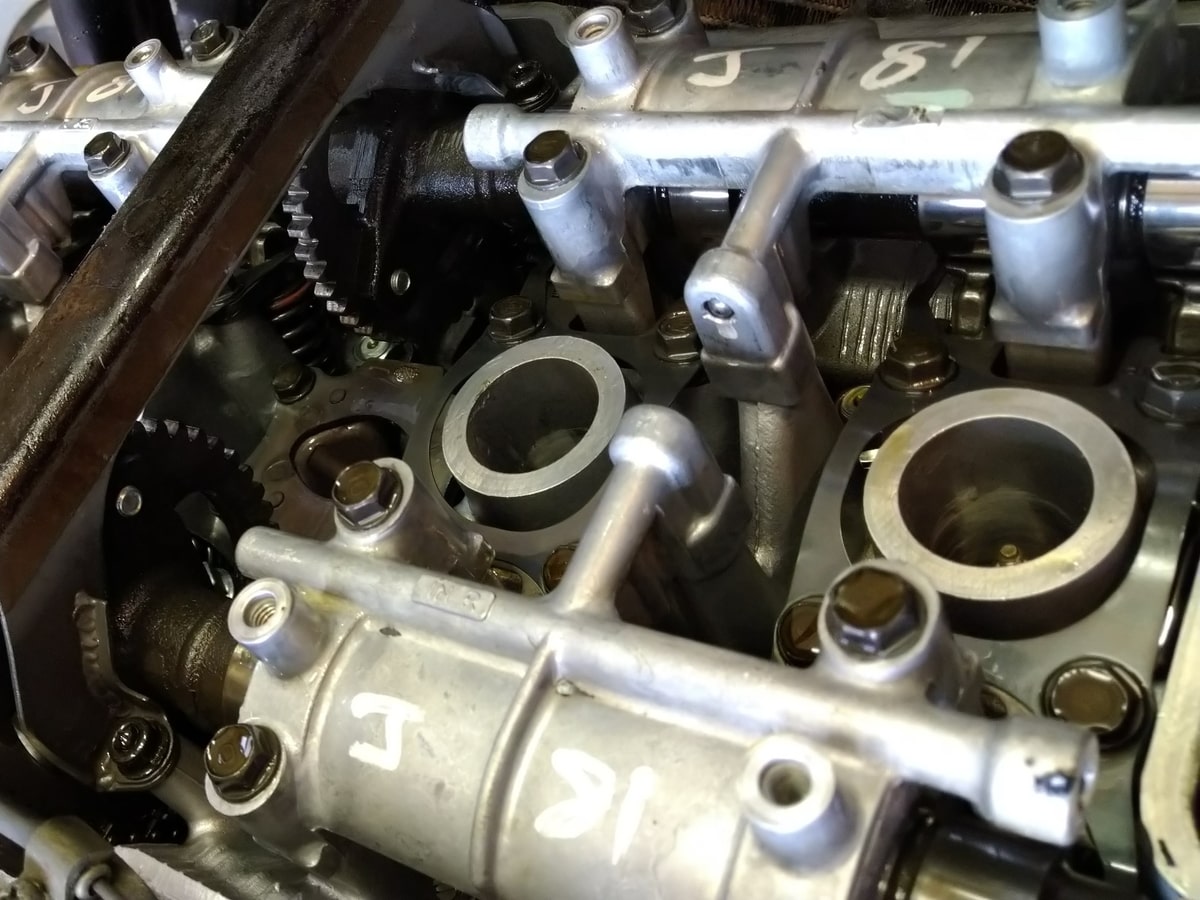
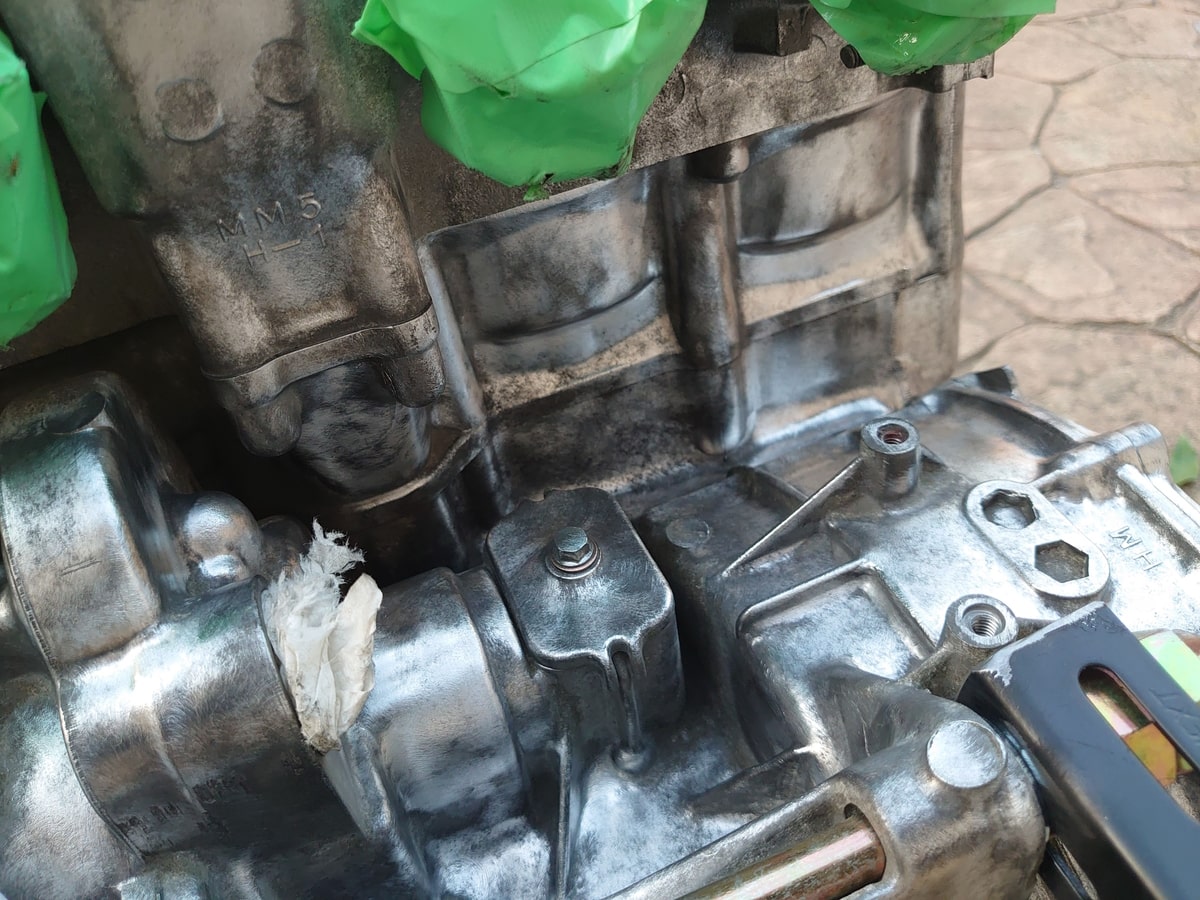
Inside the engine head
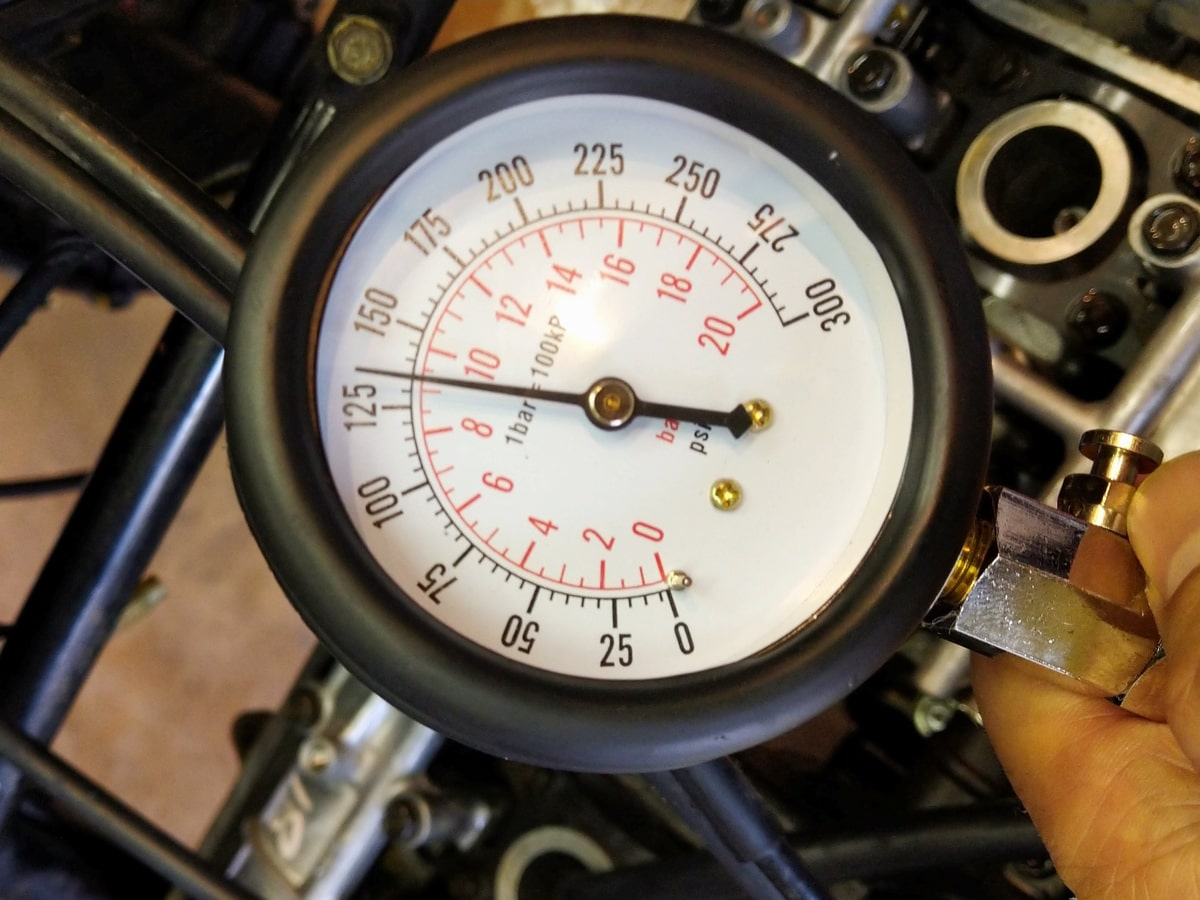
In-engine compression measurement
Preparation for engine polishing
After removing some of the dirt with a high-pressure washer, the sludge that had clogged the coolant path was removed, and the water channels inside the engine were checked to make sure there were no problems.
After high-pressure cleaning
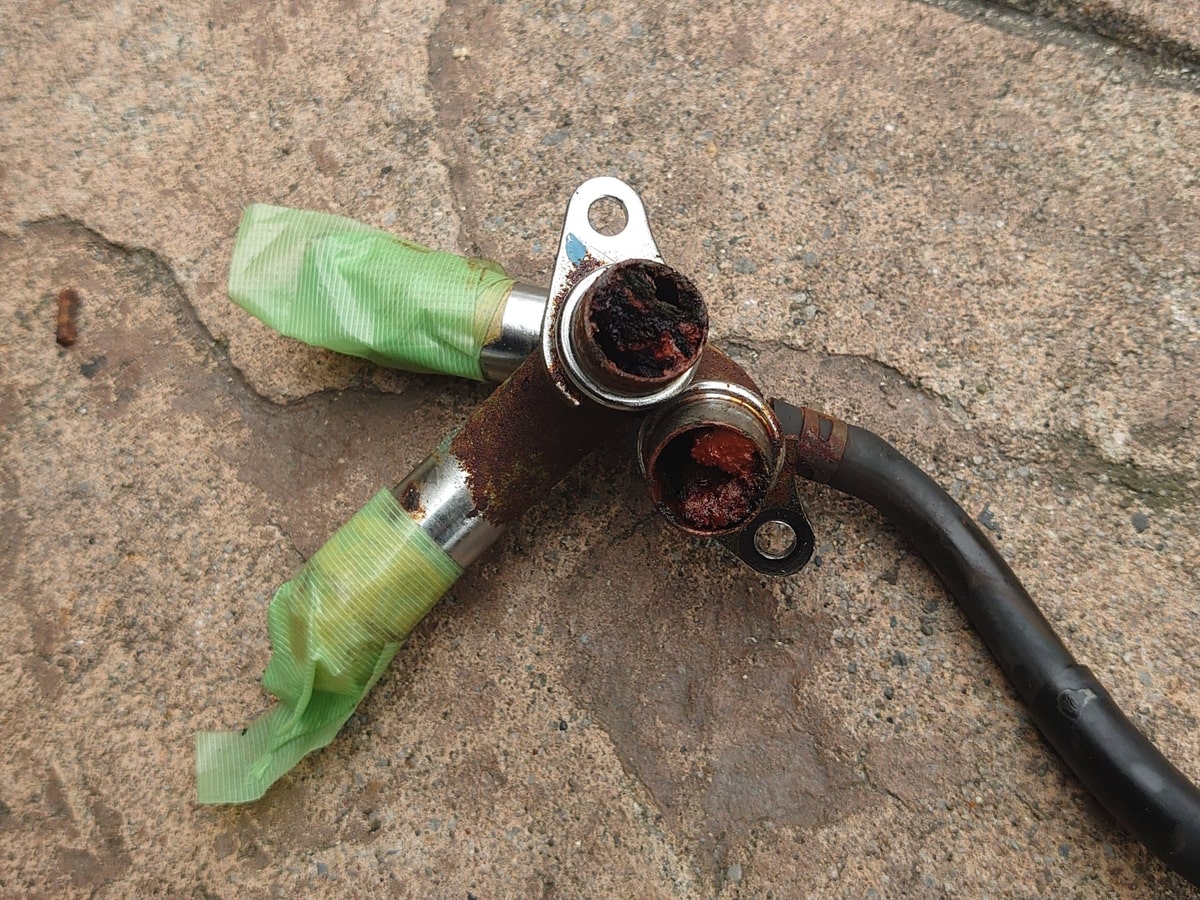
Clogged cooling water pipe before cleaning
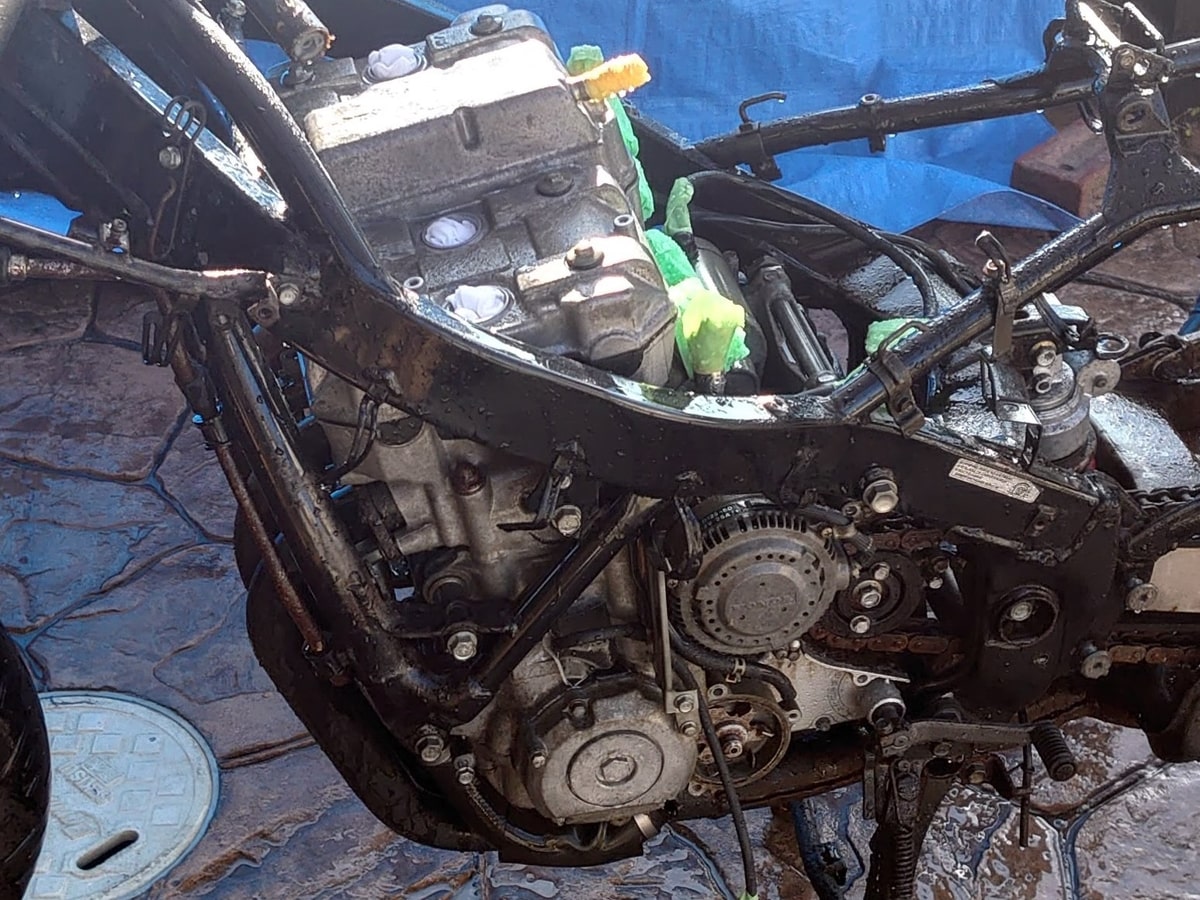
The wheels, suspension, and peripheral parts are then removed and the engine is lowered. However, it was too heavy for one person to lower the 1000CC engine, so I decided to remove the frame upward with the engine supported by the engine jack on the loader. After the engine was made into a single unit, I wanted to polish it right away, but the installation surface where the jack supports the engine is only about 1.5 postcards, and it could easily tip over if handled roughly.
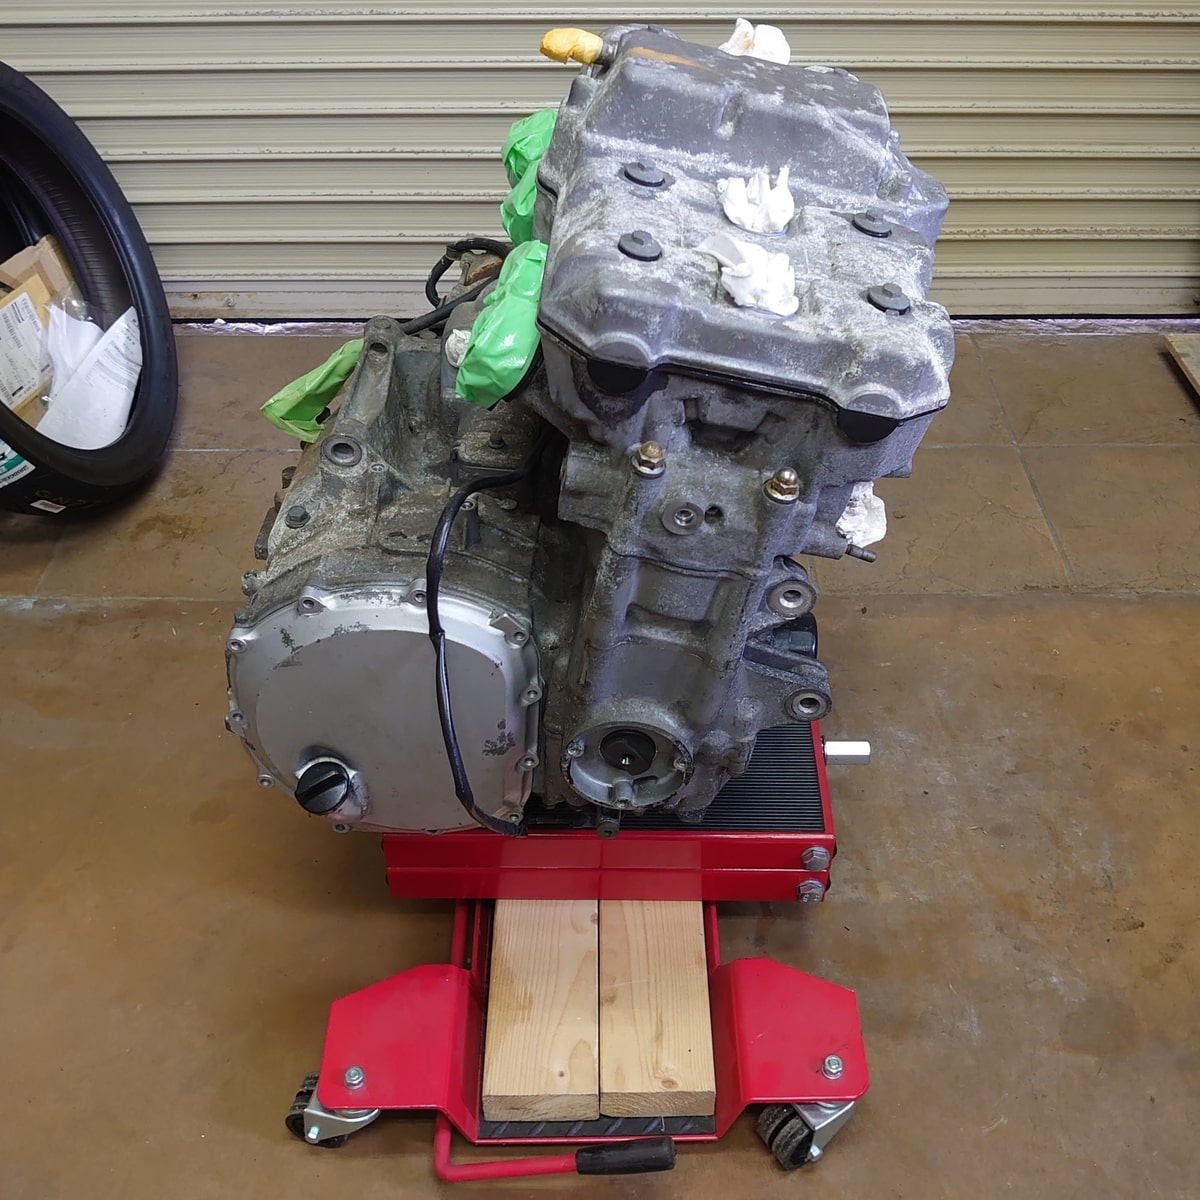
Before making home-made engine stand
I felt it would be inappropriate for me, a beginner, to buy a professional engine stand, so I decided to make a DIY engine stand using 2×4 lumber, steel angles, long bolts, and other materials to match the actual engine stand.
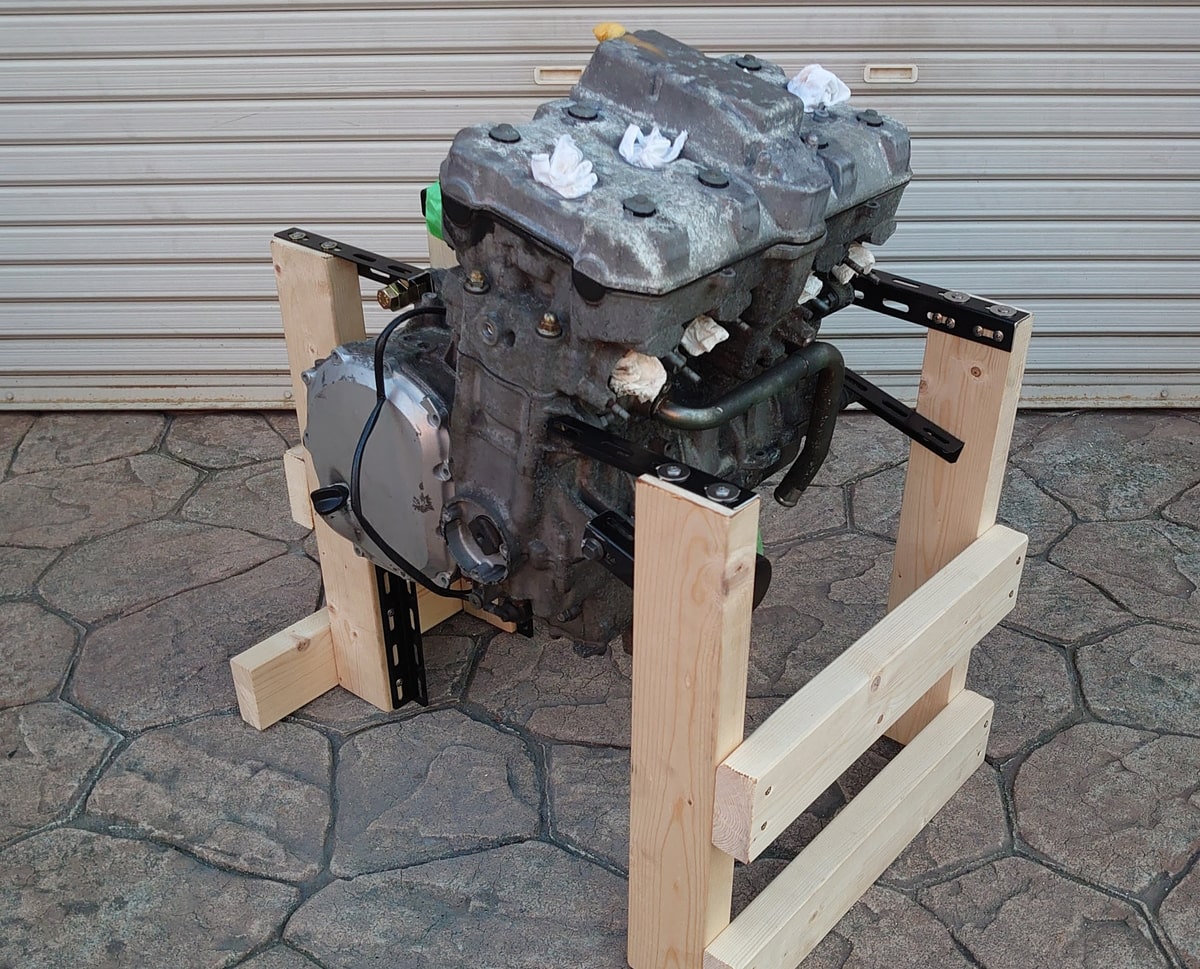
After creating your own engine stand
Engine polishing
It looks like we can avoid a fall with the homemade stand, so now we are ready to start polishing the engine, but first, we will check the condition of the engine surface. Since the engine block is aluminum, it was covered with white rust and dirt and remained brown or green even after high-pressure washing.
We found that the dirt was mainly traces of coolant leakage.
The stains were not likely to come off easily by polishing by hand and the rust. Since my predecessors had used power tools when they shined up their aging engines, I decided to try my hand at using inexpensive power tools as much as possible.
The CBR1000F (SC21) is water-cooled, so the engine does not have fins for air cooling, so it should be relatively easy, but the engine block is uneven in its own way. However, the engine block has some uneven surfaces. Since I did not know what kind of tools would be appropriate at first, I tried various tools to increase my experience.
(I wear a dust mask and protective glasses when grinding because of the dust).
Electric grinder
I use a small motor with variable speed that I purchased previously.
Compared to electric drills, the motor rotates faster and has more grinding power, so it can remove dirt and rust in a shorter time. The grinder attachment, which allows the grinding pads and brushes to be used away from the main unit, increases the number of areas that can be ground.
(Please note that you work with this attachment at your own risk.)
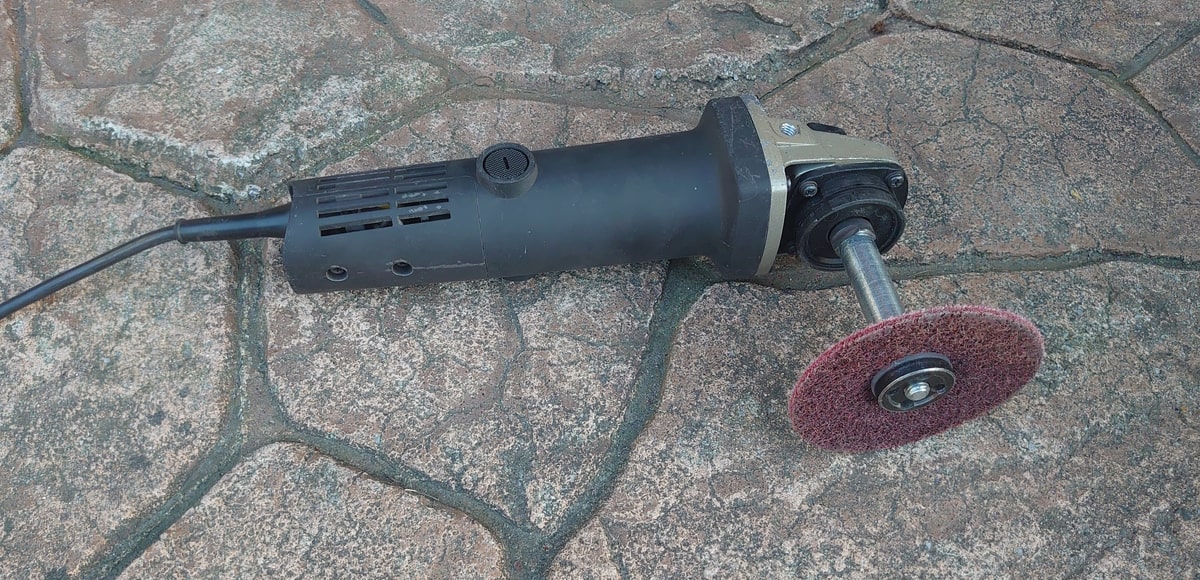
Grinder Attachment
Electric Drill
A new, powerful, wired, speed-changeable system was introduced, connected to a flexible shaft.
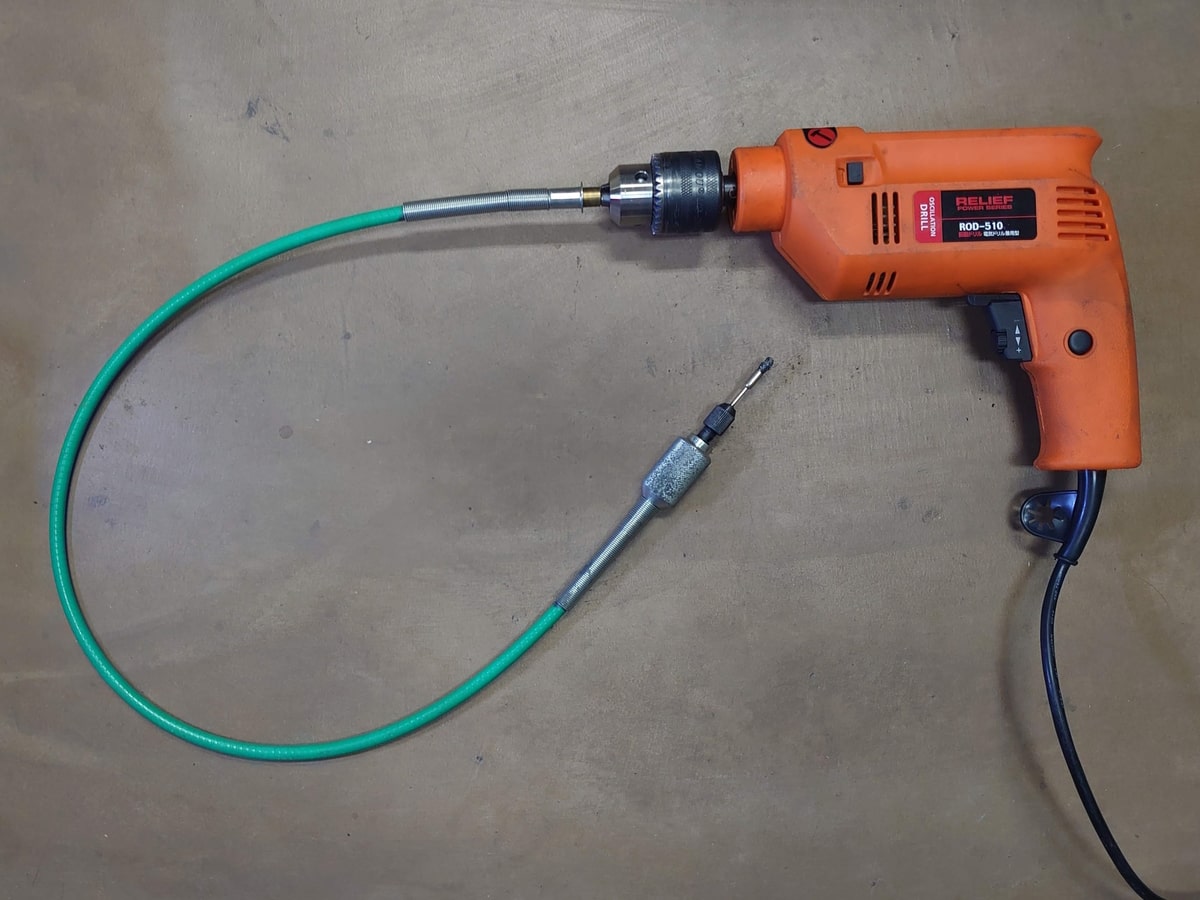
Electric drill + flexible shaft
The flexible shaft makes it very easy to use the drill while the drill body is on the floor. The 3mm shaft with a metal brush attached makes it like a pen, which eliminates the possibility of accidentally drilling in an area that is not the target area. I recommend this tool because it can be used to polish almost any area, including the deepest parts. The stainless steel brush was particularly effective on the white rust on the aluminum, and although it took some time, I was able to clean it up successfully.
Polishing work in progress
However, the 3mm shaft metal brush wears out quickly and must be replaced every time the polishing efficiency drops, so I bought a box of inexpensive ones from an import mail-order company and used them.
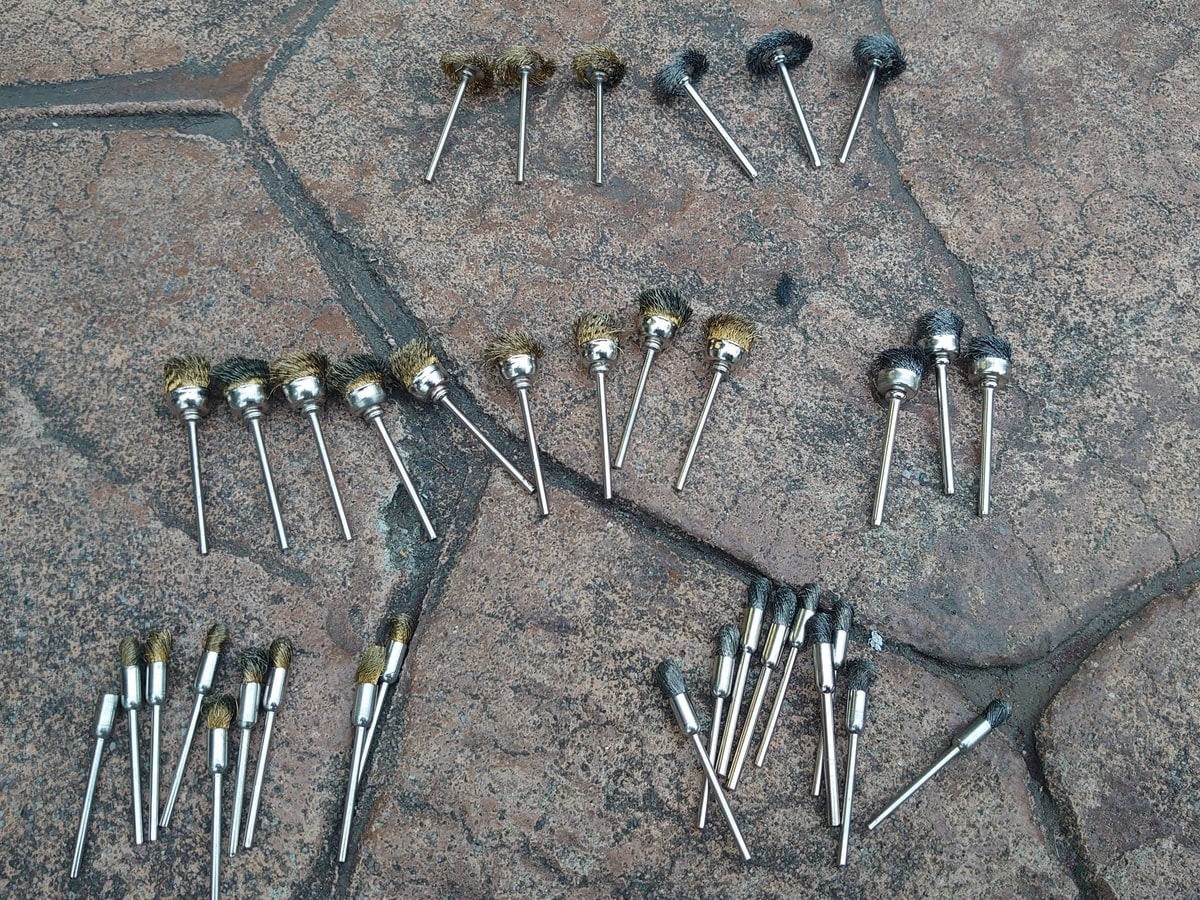
Metal brush with 3mm shaft
Checking the condition of the engine <Chapter 2>
Thanks to the construction of the engine stand, the oil pan could be removed, so it was disassembled using an oil pan separator. The inside of the oil pan was in good condition with no metallic dust of particular concern.
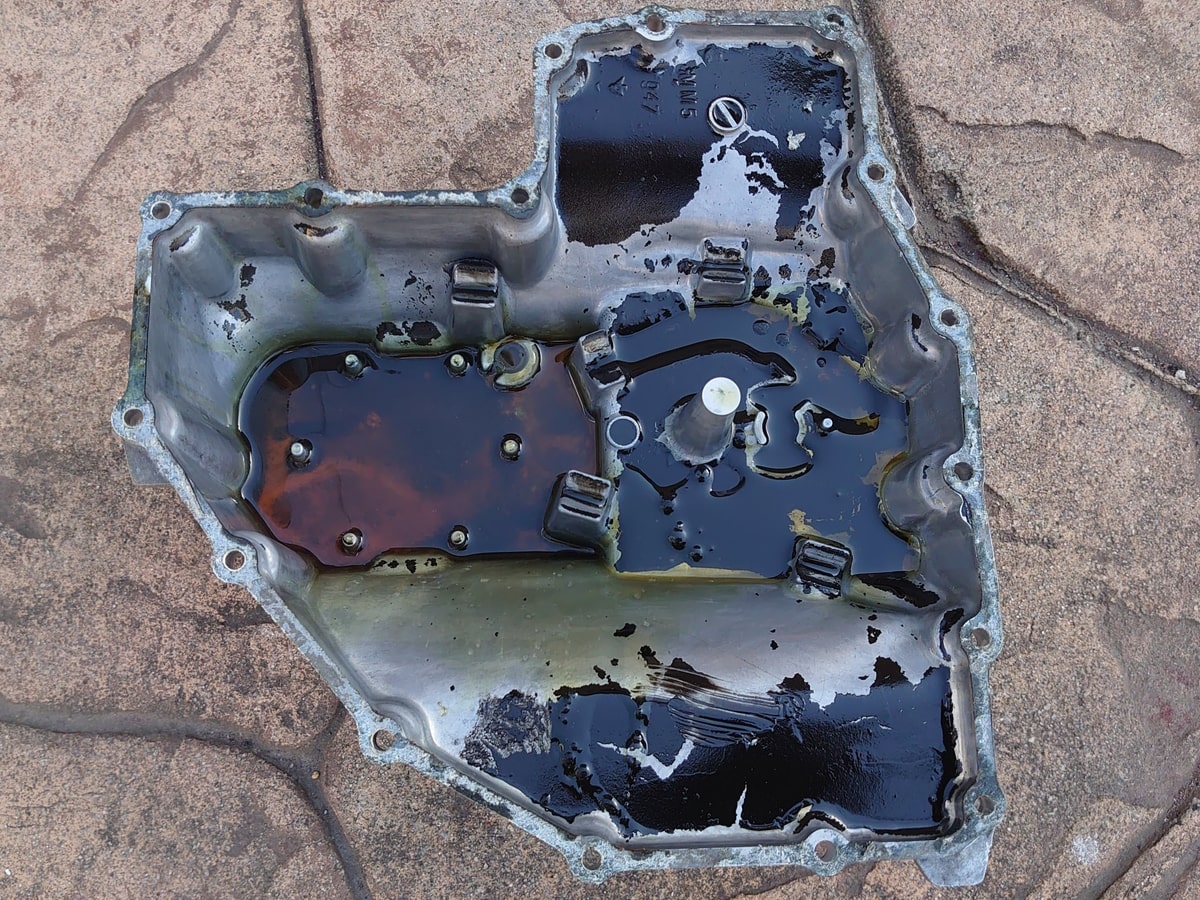
Oil pan interior
The clutch cover was also removed to check the condition of the clutch. There were no scratches or wear of concern here either, but only the clutch spring had less than acceptable natural length, so it was replaced with a new part.
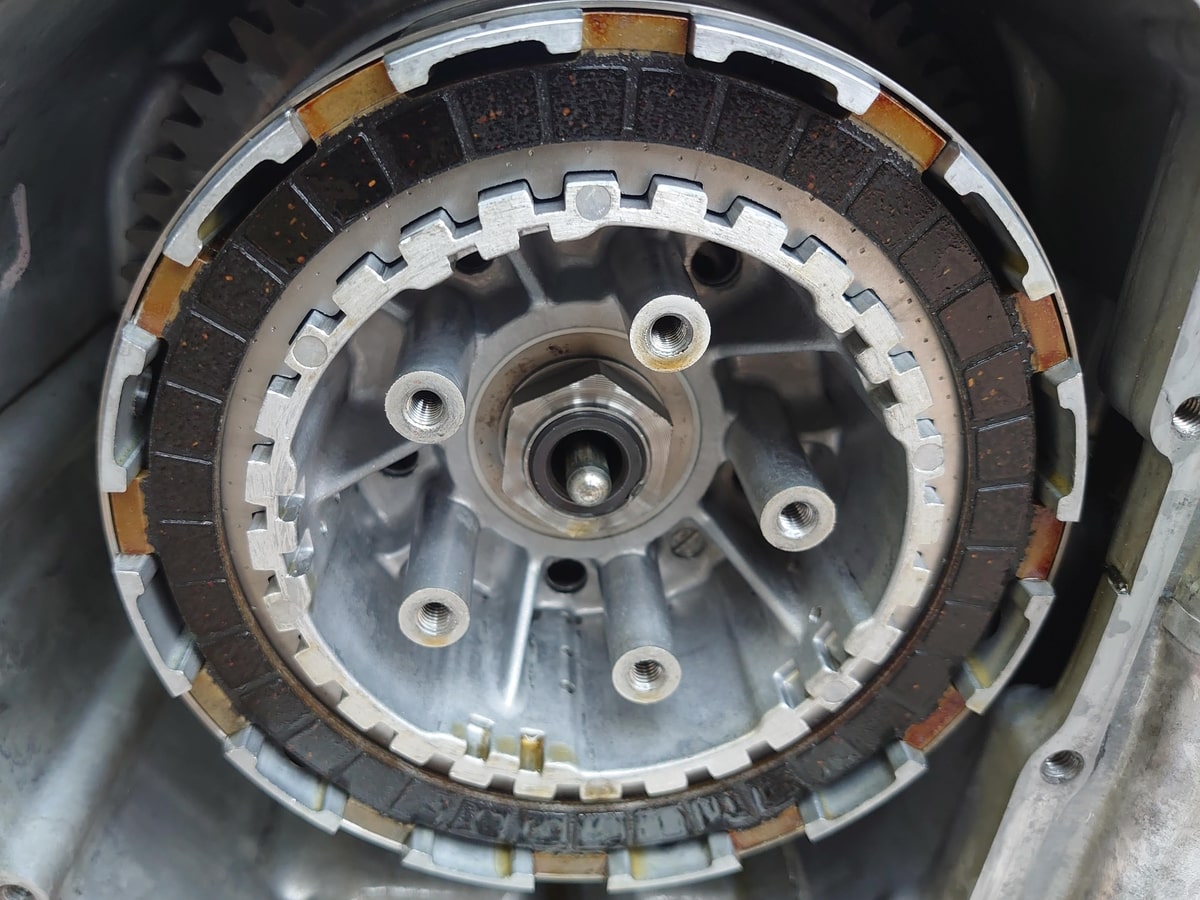
Clutch check in progress
The oil cap, a non-metallic part visible from the outside, was inadvertently polished and scratched, so I decided to replace it with a new one, but it was painfully discontinued. After much research, I found an aftermarket oil temperature gauge, so I think I will get that one and install it.
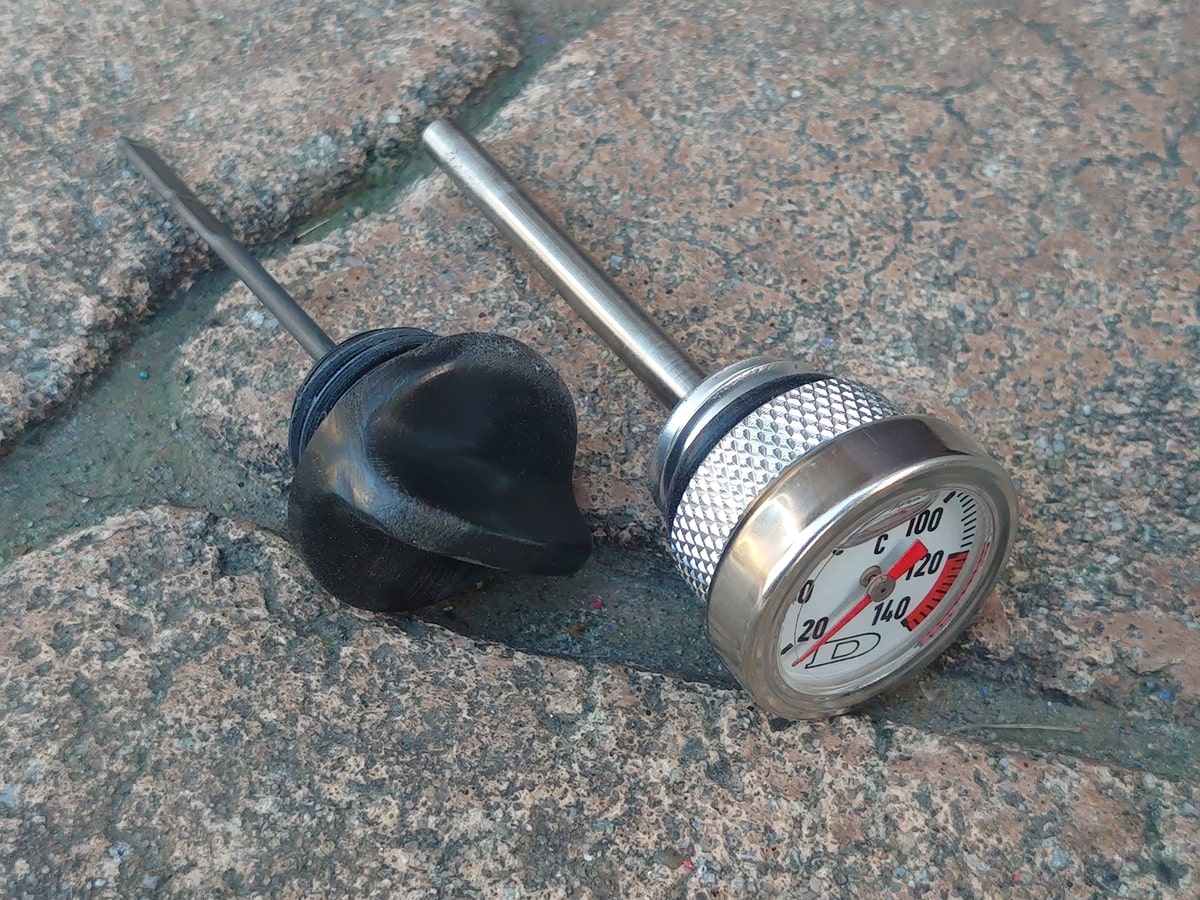
Oil cap that has been inadvertently scratched
Polishing is a steady process, so we proceeded at a leisurely pace, taking one full day to polish the flat surfaces to a certain degree and nearly three days to polish the intricate areas.
Since the engine of the CBR1000F (SC21) is almost completely hidden from view by the cowl, we decided that a mirror finish would be of little use, so once the rust was gone and the engine was somewhat clean, we lightly polished the entire surface using glass wool to complete the process.

After polishing the engine block
Engine polishing work summary
The condition of the engine was checked and the work plan was finalized. We built an engine stand and polished the engine block, which was dirty with rust and grease, using various tools. After trial and error, we used a grinder + grinder attachment + nylon polishing pad or thin brass brush where we could reach. For areas that cannot be reached, electric drill + flexible shaft + very small metal brush.
For hand finishing, steel wool. The rust and dirt could be efficiently removed by using this division of roles.
Larger brass cup brushes and abrasive discs were not very effective as they could not reach the highly concave areas. With the help of power tools and various polishing tools, we managed to clean the engine to an embarrassing degree, but since it is a full-cowl car engine, we did not go as far as using tools for polishing to make it shiny. It took us four days to realize the greatness of those who came before us to polish an air-cooled engine with fins to a mirror finish.
Next time, we will continue to refresh and paint the parts around the engine and the parts that can be removed.
Tools and Equipment Used
Ratchet Wrench
Plug Wrench
Bell Hammer **JP Website
Contact Revival Agent Spray **JP Webiste
Pressure Gauge **JP Website
Disc Grinder
Grinder attachment (extension)
Nylon Polishing Pads **JP Website
Brass brushes (fine) for disk grinder (about 5 brushes)
electric drill **JP Website
Flexible Shafts
Ultra-small metal brush (about 40 pieces)
Homemade E0ngine Stand Materials
Long bolt, nut, washer
L-type angle
2 x 4 lumber (about 1.5m)
Long wood screws
Wood cutting ruler
Metal cutting disc
Purchased Parts
CBR1000F (SC21)Genuine parts
Clutch Springs(Genuine)
Oil cap with oil temperature gauge & level gauge (external for CB)